
Before I shelled out for the dedicated Aircraft Navigation Lamp Set (install guide here) from HobbyKing I wanted to add some basic LED lighting to the motor arms of my X525 build, I still use these LED’s as one displays the Motor Arm status, the other the GPS Lock, that and the dedicated navigation lights don’t talk to Arducopter.
Update: The voltage of the LED strip has to be 5V. Too low, your strip will burn. Too high and it might not turn on (thanks Wei).
Here’s what you need and how to install it.
What you need
- 1 x red LED strip for the front-left arm
- 1 x green LED strip for the front-right arm
- 2 x white LED strip for the rear arms
- 1 x LED strip in your preferred colour for GPS Lock (I went for blue, but you could also use yellow)
- 1 x LED strip in your preferred colour for Motor Arm (I went for red, ala The Danger Zone)
Connecting the LED’s to the APM board
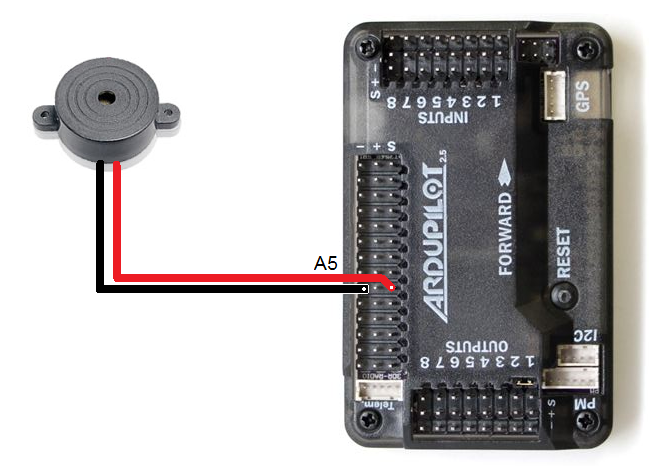
If you went out and bought the 3 LED strip’s mentioned above you can connect the LED servo cable’s directly to the APM board’s analog input’s after a quick change of one of the leads to the JR connector.
We can connect these particular LED strip’s directly to the APM board as the LED’s draw less than the maximum permissible current of the AVR chip on the APM of 40mA per input, the LED strips we’re looking at draw 33mA per input.
Update: The current limit is 40mA per pin or 200mA total. Any higher and you risk damage to the APM (thanks Wei).
By moving the positive lead (red cable) over one spot to occupy the signal line APM can power the LED lights on/off when it chooses, left unchanged the LED strip will be connected to the +5V rail and be always on; which looks cool but is useless.
- Using a small sharp knife lift up the tab on the positive lead (aka red cable) of the JR connector that holds the pin in place
- Pull on the positive lead while the tab is lifted to remove it from the JR connector
- Re-insert the positive lead into the space typically used for the signal line (the next available space) of the JR connector
- Make sure the tab is down and the positive lead is secured by giving it a pull
If you’re using the current release of APM then you’re on AC 3.1.5 (Arducopter 3.1.5) and the following will apply, read further for the AC 3.2 changes which will apply when AC 3.2 is officially released.
AC 3.1.5 (today)
- A4: AUX led
- A6: GPS – will flash with no GPS lock, solid with GPS lock
- A7 through A11: Motor LED’s (always on)
AC 3.2 (future)
- A4 : Motor LED
- A6 : GPS – will flash with no GPS lock, solid with GPS lock
- A7: Arming LED
- A8 through A11: Motor LED’s (always on)
Note: Need to confirm A8 through A11 for AC 3.2 and above as this is not currently documented on External LEDs from Arducopter Wiki.
Connect your LiPo battery and power up your APM board, lights on, enjoy night flying! When you’re ready consider upgrading to the Aircraft Navigation Lamp Set (install guide here) mentioned earlier as you can then add real-world lighting sequences to your build.