

Update (11/01/2019): I purchased a Razer Core X eGPU + GeForce GTX 970, with the eGPU connected fan noise is no longer an issue as all GPU processes are done over Thunderbolt 3.
I’ve had my XPS 15 9550 almost 18 months now, here’s my replacement history so far… all covered under Dell’s Premium Support NBD contract:
- 5 motherboards
- 1 battery
- 2 CPU fan
- 2 graphics card fan
- 1 heatsink
- 1 keyboard
I can put at least 3 of the above motherboard replacements down to me telling them “the CPU fan is too loud” which was blamed by Dell Support and on-site technicians on issues with the motherboard and promptly replaced.
The fix for the loud CPU fan – especially when a Thunderbolt device is connected – is to turn on passive cooling within Power Options and using Intel XTU undervolt the CPU 0.100 V dramatically lowering the thermal profile of the XPS 15 9550 followed by setting Dell Command Power Manager to Quiet.
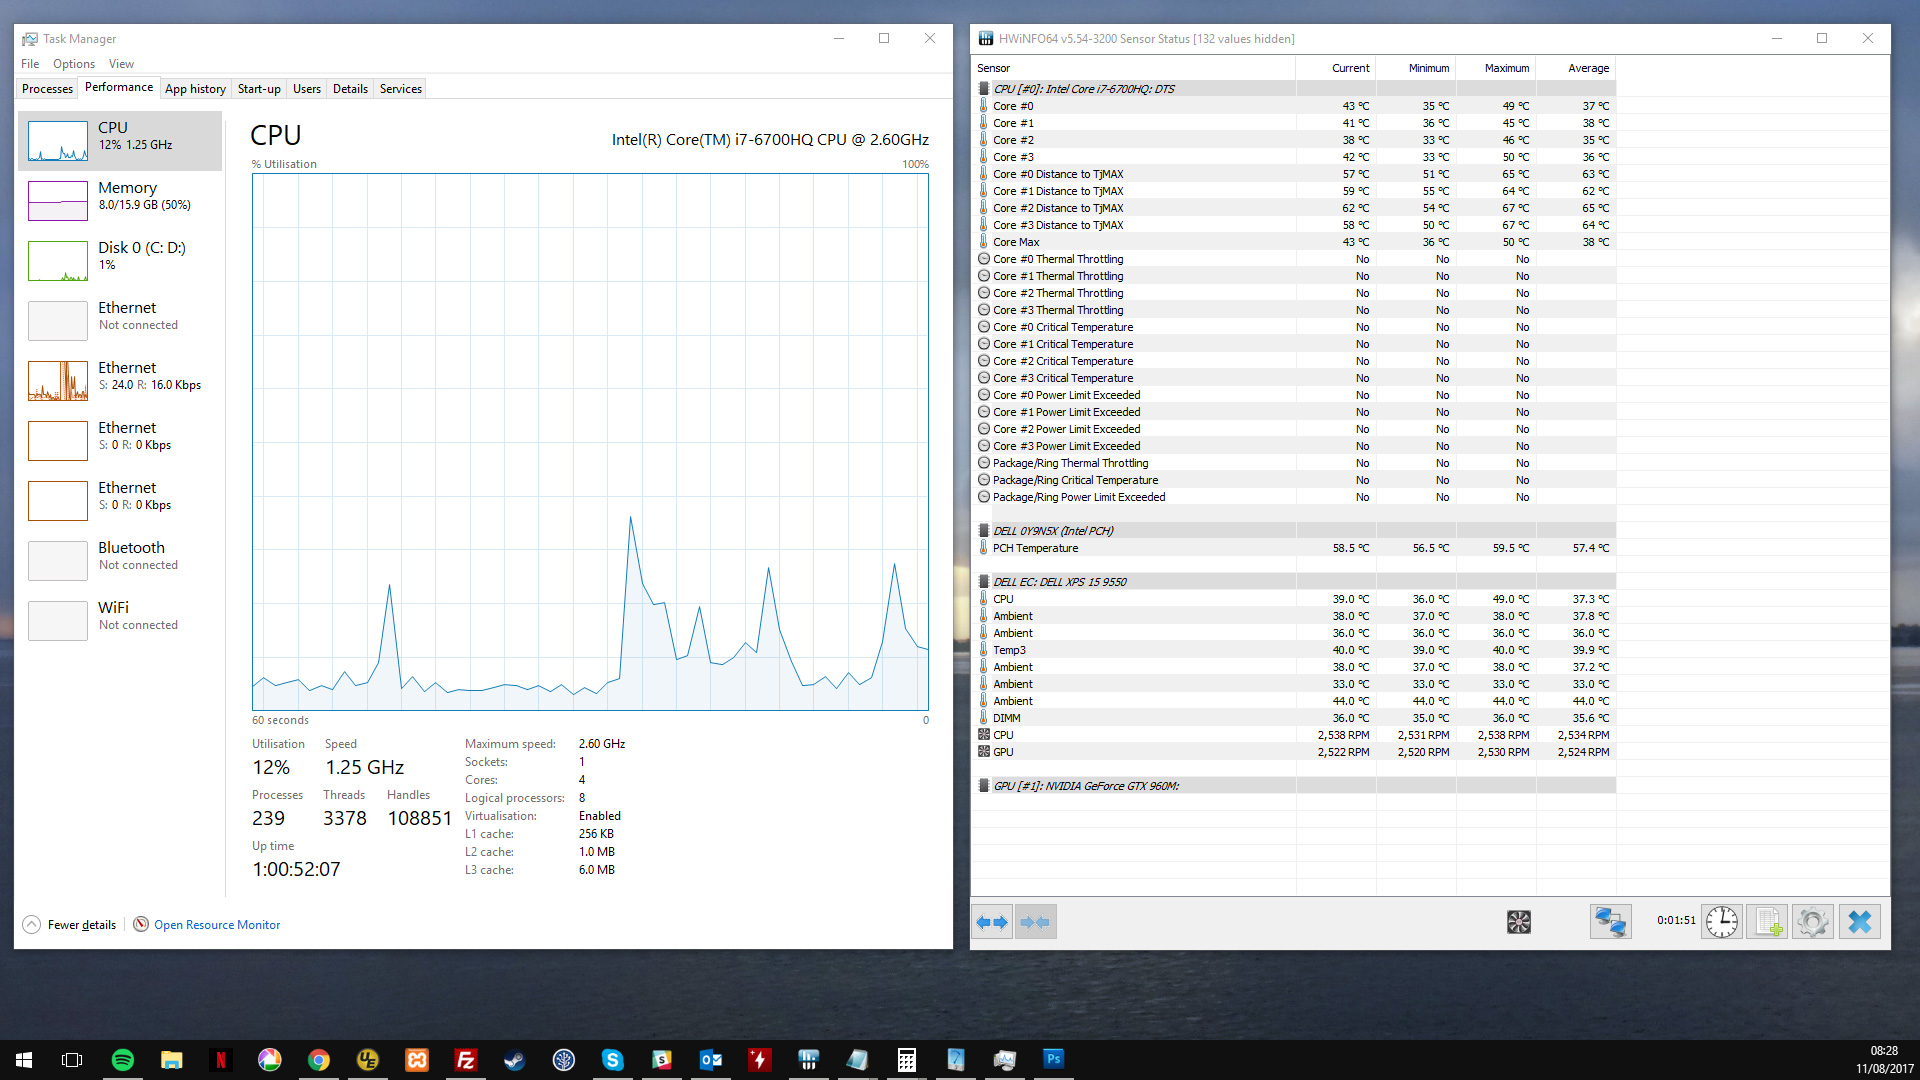
Today I have a silent machine with no noticeable effect on daily usage or CS:GO gaming performance, that’s with 2 Dell U2414H monitors occupying the HDMI and Thunderbolt connectors. I have multiple Chrome tabs open (10+), Slack and other typical CPU hogs running without the CPU fan attempting to rise off the desk.
Here’s how to fix the loud CPU fan on the Dell XPS 15 9550:
Part 1: Turn on passive CPU cooling
- Right click the battery icon in the start taskbar
- Select Power Options
- Click Change plan settings beside the Balanced power plan
- Click Change advanced power settings
- Expand the Processor power management list
- Expand the System cooling policy list
- Set the On battery and Plugged in options to Passive
- Click OK to save changes
- Click Save Changes on the Edit Plan Settings window to save changes
Part 2: Undervolt the CPU 0.100V
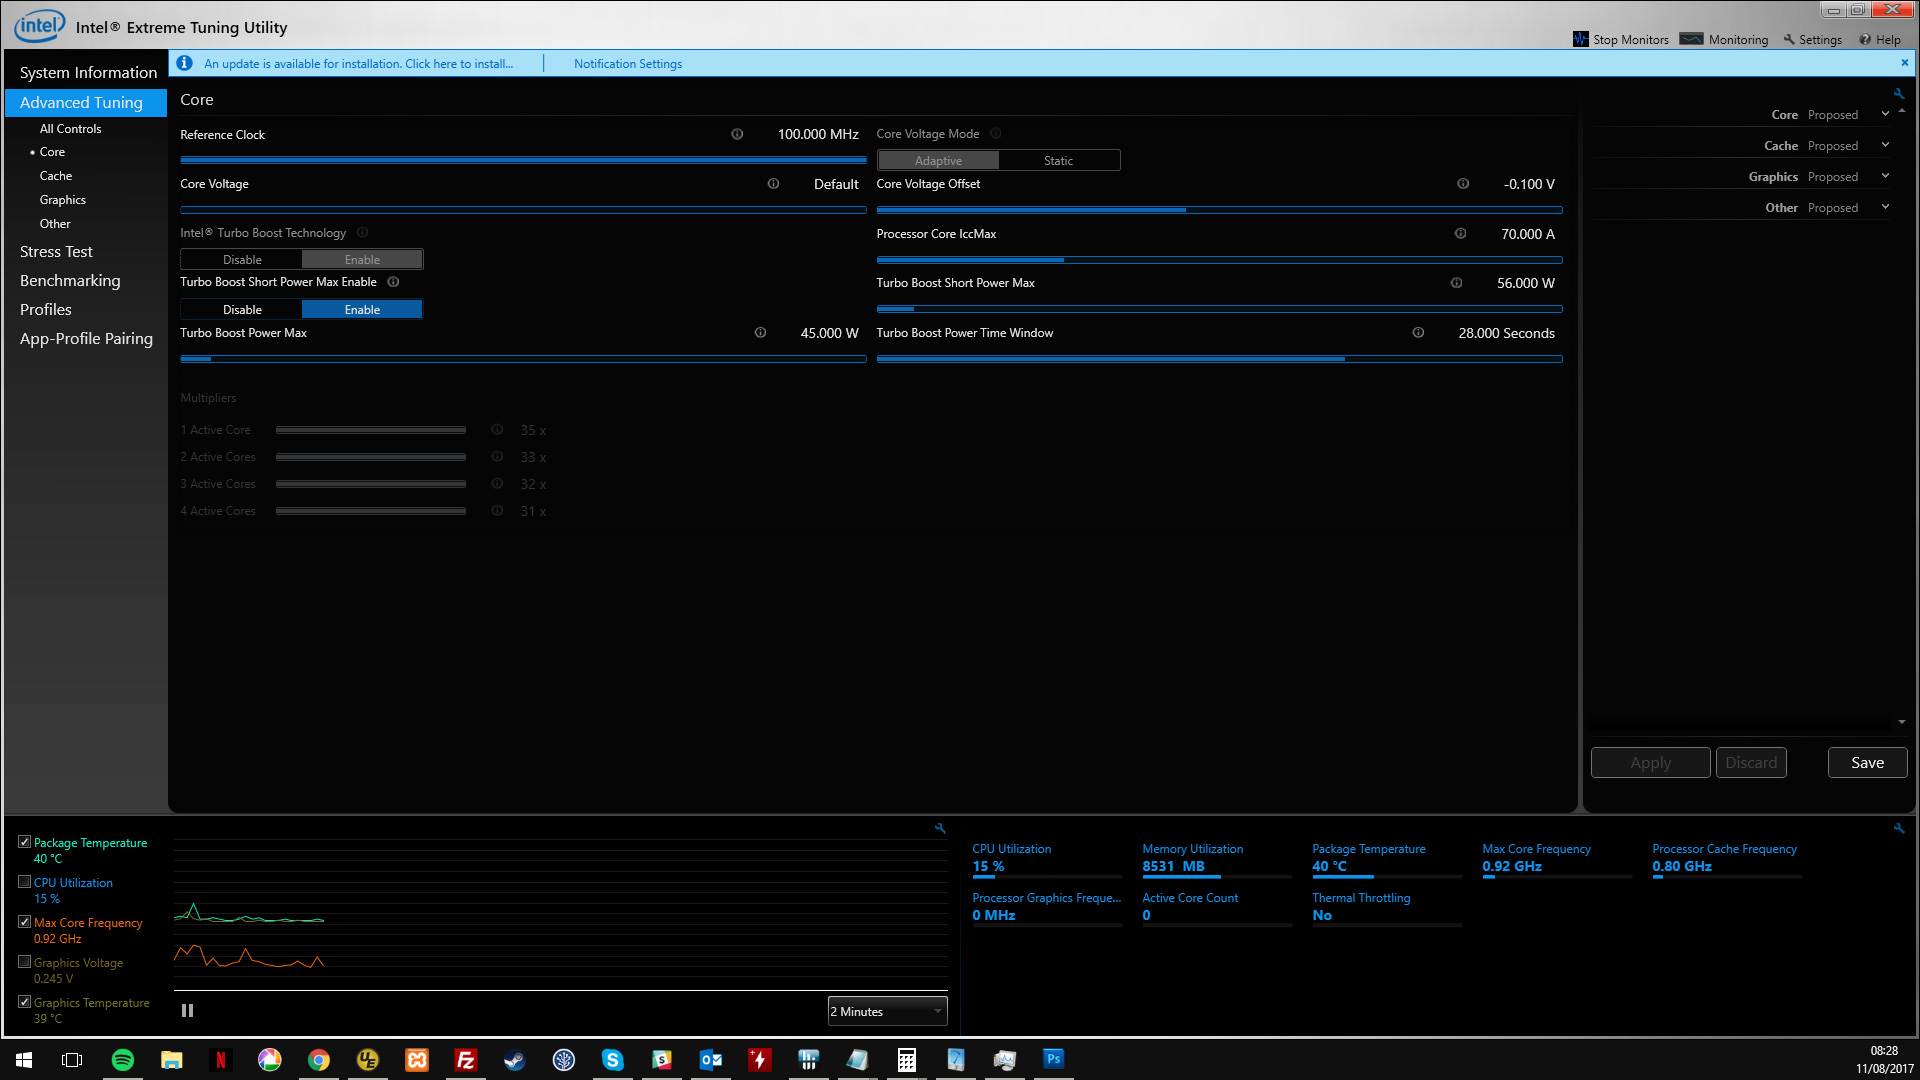
- Download the Intel Extreme Tuning Utility from the Intel website
- Install and open Intel Extreme Tuning Utility (ala Intel XTU)
- Open the Advanced Tuning > Core section
- Find the Core Voltage Offset slider
- To the right of the Core Voltage Offset slider hover over the 0.000 V value to show the decrease/increase toggles
- Click the decrease toggle until the Core Voltage Offset indicator shows -0.100 V
- Click Apply
- Close Intel XTU and restart the computer
Part 3: Dell Command | Power Manager
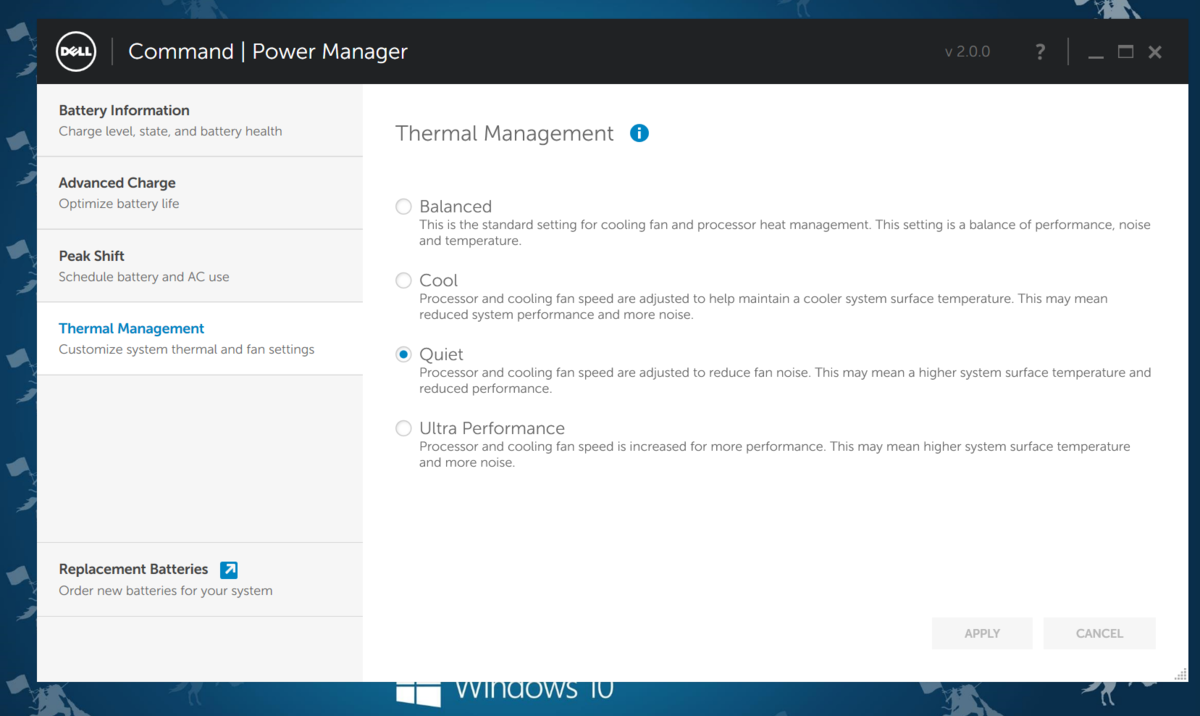
- Download and install Dell Command | Power Manager from Dell’s website
- Open Dell Command Power Manager from the Start menu
- Switch to the Thermal Management tab
- Set the Thermal Setting to Quiet
That’s it! 😀